.png)
Microsoft has made it easier to add stylized signatures to Outlook for Microsoft 365 and Outlook versions 2010, 2013, 2016 and 2019 with a new gallery of templates that can be personalized to fit your needs.
Below are step by step instructions for editing the free Microsoft templates and adding them to Outlook.
Step 1 - Download the templates
Download the email signature gallery template from Microsoft and open the document in Word. Select Enable Editing when the document opens, if necessary.
Step 2 - Chose your signature
Hover over the upper right corner of the signature you would like to use and click the box to select all elements in the signature and select Copy.

Step 3 - Paste into Outlook and change the text
Open Outlook, select New Email and paste the copied signature into the email message body. Select the text within the signature to replace the address, phone and other information as needed.
Step 4 - Change the image
To edit the photo, right-click the image in the signature and select Change Picture from the dialog box. Select the photo or image you would like to use and select Insert.

To resize the image, select the image to see the drag handles appear around the image and move the handles to resize the image as needed. Other image options can be found under the Format menu highlighted in the upper ribbon of Outlook.
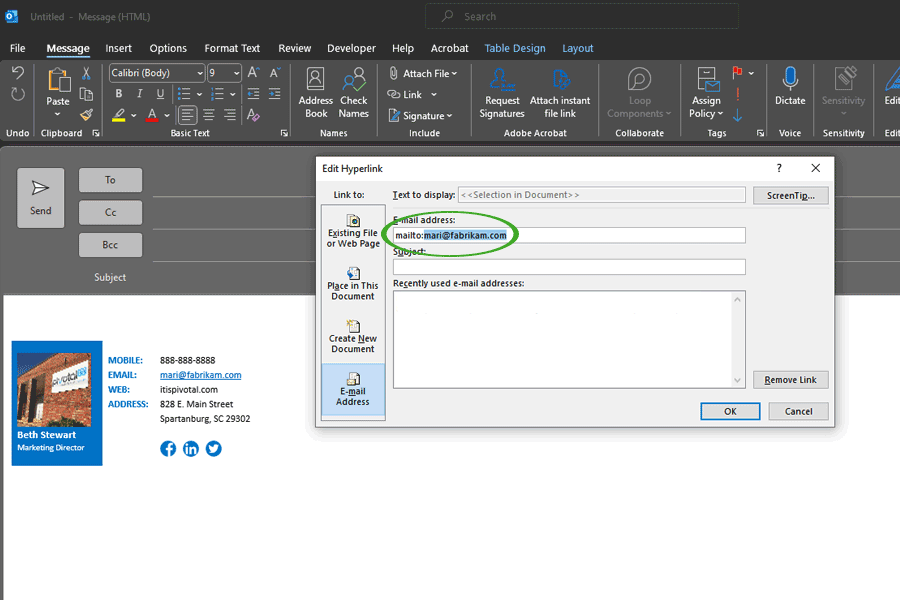
Step 5 - Change the email address
To edit the email address highlight and right click the email address within the signature and select Edit Link. The image below shows the Edit Link dialog box and email address. Delete everything after mailto: and type in your email address then click OK
Step 6 - Change the links to your website / social channels
Select the icon or text to be linked within the signature, right click and select Link. In the dialog box, confirm that Existing File or Webpage is highlighted and type in or paste the web address for the link into the Address section at the bottom of the box and click OK.

Step 7 - Save your signature
After you have finished personalizing your signature, select all the elements of the signature, right click and select Copy. From the Include group in the top ribbon (1), select Signature and choose Signatures from the Message Menu. Click New (2), type in a name for your signature and right click in the Edit signature field and select Paste. Your Signature should now be displayed in the field. Select Save. Use the dropdown menu under Choose default signature to add the signature automatically on any new messages or replies. Click Ok (4).

Congratulations, you've just set up your email signature! We have also added a PDF version of these instructions to our Guides and Resources page, under the Windows heading.


.svg)